Rapid Tooling for Injection Molding — T1 Samples in 12–18 Days
A product development team has a prototype that passed functional testing. The design is stable. The next step is 500–5,000 parts for beta testing, a trade show, or a regulatory submission — and they need those parts in three weeks, not three months. The injection mold that will eventually run 500,000 parts per year in H13 steel at a 15-second cycle time takes 5–6 weeks to build. The team does not have 5–6 weeks. They have 21 days.
This is the gap that rapid injection mold tooling fills. Not by cutting corners on the mold build — but by selecting the right tooling strategy for the timeline and volume the project actually requires.
This guide covers when rapid tooling is the correct engineering decision, what you trade for speed, and how to specify a rapid tooling project so the parts you receive are the parts you need.
1. What Rapid Tooling Is — and What It Is Not
Rapid tooling for injection molding is a set of tooling strategies that reduce mold build time by selecting faster-machining materials, simplifying mold construction where the part design allows, and prioritizing speed-to-T1 over multi-decade shot life. The key word is strategies, plural — there is no single “rapid mold.” There are three distinct approaches, each with a different cost-speed-life balance.
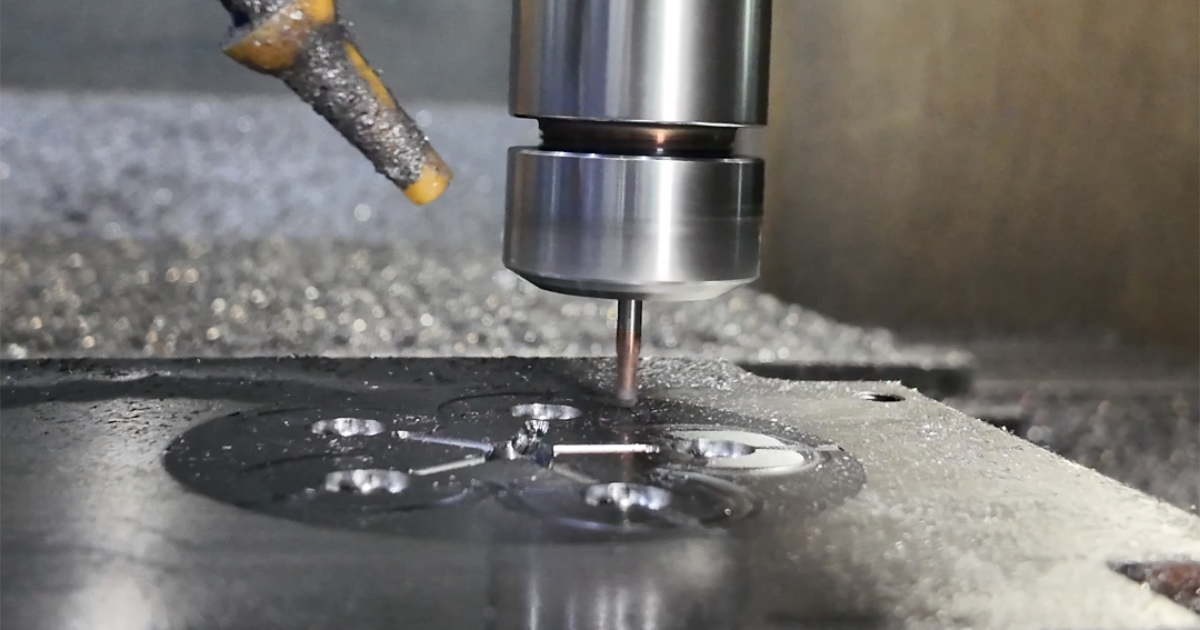
Rapid tooling is not prototype molding in the 3D-printed-mold sense. A 3D-printed plastic mold insert in a benchtop press produces a handful of parts in the intended material, but the parts carry the process signature of the printed tool — wider tolerances, different surface finish, different cooling behaviour. Rapid tooling, as practiced in a production mold shop, uses CNC-machined aluminum or pre-hardened steel in a standard mold base running on a production injection press. The parts come out of the same process as production parts. The difference is in the tool material and the expected shot life — not in the molding process itself.
2. The Three Speed Tiers
Rapid tooling is not one option. It is a spectrum. The correct tier depends on how fast you need parts relative to how many parts you need, and whether the tool will ever be asked to run beyond its initial purpose.
| Tier | Tool Material | T1 Lead Time | Expected Shot Life | Mold Cost (Relative) |
|---|---|---|---|---|
| Prototype | Aluminum 7075-T6 | 12–18 business days | 5,000–20,000 shots | 0.3–0.5× |
| Bridge | P20 pre-hardened | 18–25 business days | 50,000–200,000 shots | 1× (baseline) |
| Production | H13 hardened (48–52 HRC) | 28–40 business days | 500,000–1,000,000+ shots | 1.4–1.8× |
Tier 1 — Aluminum Prototype Tooling (12–18 Days)
A 7075-T6 aluminum mold is the fastest path to injection-molded parts. Aluminum machines at 3–5× the feed rate of P20 steel with standard carbide tooling. A cavity that takes 12 hours to machine in P20 takes 3–4 hours in aluminum. EDM time is reduced proportionally. The total mold build time — CNC roughing, finishing, EDM for sharp corners, fitting, and bench work — compresses from 4–5 weeks to 2–3 weeks.
What you get: real injection-molded parts in the production material, from a mold built on a standard mold base, running on a production press. Tolerances of ±0.05mm are achievable. SPI B-2 surface finish is standard. This is not a benchtop approximation — it is a production process with a shorter-lived tool.
What you do not get: a mold that will run 100,000 shots. Aluminum wears. The parting line erodes under repeated clamp force. The cavity surface, even hard-anodized, will show wear after 10,000–20,000 shots depending on the resin — glass-filled materials accelerate wear significantly, unfilled PP or ABS are gentler. Gate areas wear first. Ejector pin bores in aluminum can ovalize under sustained cycling. This is a mold with a known, finite service life, and that is the point: it is built to deliver a specific number of parts on a specific timeline for a specific phase of product development, not to run for a decade.
Tier 2 — Bridge Tooling in P20 (18–25 Days)
Bridge tooling uses pre-hardened P20 steel — the same steel grade as a standard production mold — but with a simplified construction approach where the part geometry permits. The steel machines slower than aluminum but faster than hardened H13. A P20 bridge tool typically uses a standard mold base (off-the-shelf, not custom-machined), standard ejector systems, and cold runner unless hot runner is specifically required.
The term “bridge” is literal: this tool bridges the gap between prototype validation and full production. A product development program might start with a P20 single-cavity tool for the first 20,000–50,000 parts while the design stabilizes through beta testing and initial market feedback. Six months later, when the design is locked, a multi-cavity H13 production tool takes over. The bridge tool has served its purpose and can be retired — or kept as a backup for low-volume replenishment orders.
P20 bridge tooling achieves tolerances of ±0.03mm, supports SPI A-2 polish if required, and handles glass-filled and engineering resins without the accelerated wear that aluminum suffers.
Tier 3 — Production Tooling in H13 (28–40 Days)
This is not rapid tooling — it is standard production tooling included here as the baseline for comparison. An H13 tool hardened to 48–52 HRC, with custom mold base, hot runner if specified, and full SPI finish capability, is the tool that runs 500,000 or more shots with predictable maintenance intervals. The lead time is driven by hard-milling with micro-grain carbide at lower feed rates, sinker EDM for detailed features, and the additional fitting and polishing time that hardened steel requires. There is no shortcut to a 500,000-shot tool.
3. Aluminum vs P20 vs H13 — The Trade-off Table
| Property | Aluminum 7075-T6 | P20 Pre-Hardened | H13 Hardened |
|---|---|---|---|
| Machining speed | 3–5× faster than P20 | Baseline | 0.5–0.7× of P20 (hard milling) |
| Shot life | 5,000–20,000 | 50,000–200,000 | 500,000–1,000,000+ |
| Achievable tolerance | ±0.05 mm | ±0.03 mm | ±0.01–0.02 mm |
| Max surface finish | SPI B-1 (anodized) | SPI A-2 | SPI A-1 |
| Glass-filled resin | Not recommended — accelerated gate and cavity wear | Acceptable with moderate wear | Standard — designed for filled materials |
| Repairability | Limited — aluminum does not weld-repair cleanly | Weldable, re-machinable | Fully repairable — weld, re-machine, re-harden |
| Thermal conductivity | Higher — faster cooling, shorter cycle time | Moderate | Lower — longer cooling time |
| Mold cost (relative) | 0.3–0.5× | 1× | 1.4–1.8× |
| Best for | Beta testing, trade show parts, design validation, regulatory samples | Pilot production, bridge-to-production, volumes to ~50K/year | Full production, volumes >50K/year, programs with design stability |
The cost numbers are not abstract. A part that requires a $12,000 P20 production mold might cost $4,500 in aluminum. The aluminum tool delivers real injection-molded parts in 14 business days. The trade is shot life — and for the development phase the product is in, shot life beyond 5,000 may be irrelevant.
4. Bridge Tooling Strategy — Validate Before You Invest
The highest-ROI use of rapid tooling is the bridge strategy: prototype in aluminum, bridge to P20, then commit to H13 production tooling only when the design is stable and the volume justifies the investment.
Phase 1 — Aluminum prototype (Weeks 2–3): 200–2,000 parts for internal testing, beta customers, regulatory submissions. The design may change based on feedback. If it does, you have lost a $4,500 aluminum mold — not a $35,000 four-cavity H13 production tool.
Phase 2 — P20 bridge tool (Weeks 4–6): Design is stabilized but annual volume is uncertain. The P20 tool runs 5,000–30,000 parts over 6–12 months. If the product succeeds, the tool has paid for itself and the per-part cost was competitive. If the product is revised, the P20 tool retires with its amortized cost absorbed.
Phase 3 — H13 production tool (Months 6–12): Design is locked. Volume trajectory is confirmed. The H13 multi-cavity tool replaces the bridge tool, delivering the lowest per-part cost for the production lifetime of the product.
This three-phase approach does not cost more than jumping directly to an H13 production tool at the start. It costs less when you account for the probability of design changes — and the cost of modifying or scrapping a hardened production mold that was built for a design that was not yet final.
5. DFM Considerations for Rapid Tooling
Designing a part for rapid tooling is not the same as designing for production tooling. Some features that are routine in a production mold become lead-time drivers in a rapid tool, and some compromises that make sense for speed will need to be revisited if the design later transitions to production tooling.
Simplify undercuts where possible. A side action adds $800–2,500 and 3–5 days to any mold build. In rapid tooling, where the timeline is the primary deliverable, eliminating a side action in favour of a post-molding operation or a design change can cut 20% off the lead time. If the production mold will eventually need the side action, the rapid mold can be designed with a simpler tooling approach while the part geometry is validated.
Relax surface finish requirements. SPI A-2 polish adds 8–16 hours of manual bench work per cavity. For a prototype or bridge mold, SPI B-1 or B-2 finish is functionally identical for all purposes except cosmetic evaluation. Reserve high polish for the production tool.
Design for single cavity. Multi-cavity rapid tools defeat the purpose — the additional cavities add machining time that pushes the lead time into bridge or production territory. A single-cavity aluminum mold running a 25-second cycle produces 144 parts per hour, or roughly 3,400 parts per day of continuous operation. For a beta run of 2,000 parts, that is less than one day of production.
Avoid textures that require chemical etching. Mold-Tech or VDI textures require photoresist, exposure, and chemical etching — a multi-day process that sits on the critical path. If texture is required for part function (grip surfaces, light diffusion) rather than appearance, specify a machined texture that the CNC can produce directly.
6. When Rapid Tooling Is the Wrong Choice
Rapid tooling is not appropriate for every situation. The following scenarios call for a production tool from the start:
The design is already locked and production-validated. If the part has passed all testing, the design is frozen, and the volume forecast is firm, there is no value in an intermediate tooling stage. Go directly to H13 production tooling.
Annual volume exceeds 50,000 parts. At volumes above roughly 50,000 parts per year, the per-part cost penalty of a single-cavity aluminum or P20 tool — versus a multi-cavity H13 production tool — exceeds the upfront tooling savings within the first 12 months of production.
The material is glass-filled, high-temperature, or corrosive. PA66-GF30, PPS GF40, and similar abrasive materials will destroy an aluminum mold within a few thousand shots. PVC and FR grades evolve corrosive gases that attack aluminum. For these materials, P20 is the minimum and H13 or stainless is preferred.
The part requires tight tolerances across multiple cavities. If the specification demands Cpk ≥ 1.67 on critical dimensions in a multi-cavity configuration, rapid tooling is not the path — the tool construction and process validation required for that capability level are inherently incompatible with a compressed timeline.
Frequently Asked Questions
How much does a rapid aluminum mold cost?
An aluminum prototype mold for a typical consumer product housing (medium complexity, single cavity, no side actions, SPI B-2 finish) costs $3,500–$7,000 depending on part size and geometry. The same part in P20 costs $8,000–$15,000. These are the molds that produce the parts in the photographs on a product development team’s desk — not estimates, not approximations.
Can a rapid mold be converted to a production mold later?
No. An aluminum mold cannot be “upgraded” to a production mold. The aluminum cavity cannot be re-cut in steel — the mold is built from the ground up in the target material. What can be reused is the part data: the mold design file, the CNC toolpaths, the EDM electrode designs, and the process parameters developed on the rapid mold all transfer to the production mold build, reducing the production mold lead time by approximately 20–30% versus starting from scratch.
What is the difference between rapid tooling and 3D-printed injection molds?
A 3D-printed mold insert — typically in a photocured resin — produces a few dozen parts with wider tolerances, different surface finish, and non-representative cooling. The parts are useful for fit checks and early design review but are not representative of production part quality. A CNC-machined aluminum rapid tool produces parts on a production press using the production material and process — the parts are indistinguishable from production parts except that the tool has a shorter life. For a detailed comparison, see Injection Molding vs 3D Printing: Which Is Right for Your Project?.
How fast can you really deliver T1 samples?
12–18 business days from design approval to T1 samples shipped, for an aluminum tool of typical complexity. This is not a theoretical timeline — it is a standard lead time that we quote and meet. The prerequisites: the part design must be DFM-reviewed and approved, the mold design finalized, and the steel (or aluminum) ordered. The clock starts at mold design sign-off, not at RFQ receipt. The DFM review and mold design phase adds 1–3 business days.
Rapid tooling is not a compromise. It is a deliberate tooling strategy for a specific phase of product development — the phase where speed matters more than shot life, where design validation matters more than per-part cost optimization, and where the correct mold is the one that delivers parts on the timeline the project requires.
Submit your part file for a free DFM review and rapid tooling timeline →
Learn more about JBRplas rapid tooling and low-volume manufacturing →